The Brane SDK provides comprehensive support for diverse computing architectures, enabling developers to build high-performance applications that can leverage the full potential of modern hardware. This cross-platform compatibility ensures your applications can run efficiently across different computing environments.
Supported Architectures #
| Architecture | Description | Supported Programming Models |
|---|---|---|
| Intel & AMD CPUs | General-purpose processors optimized for single-threaded and multi-threaded workloads with advanced instruction sets | C/C++, OpenMP, POSIX Threads (PThreads) |
| Qualcomm CPUs | ARM-based processors designed for energy efficiency while maintaining high performance | C/C++, OpenMP |
| NVIDIA GPUs | Massively parallel processors with thousands of cores, optimized for data-parallel workloads using CUDA and OpenCL | OpenCL, CUDA |
| AMD GPUs | High-performance parallel processors supporting HIP, OpenCL, and specialized matrix acceleration units | OpenCL, HIP |
| Kalray Manycore Processors | Innovative manycore architecture designed for deterministic, high-throughput parallel processing | OpenCL, C/C++ |
Brane Workstations: Optimized Target Hardware #
While the SDK supports custom hardware configurations, it is specifically optimized for Brane Workstations—high-performance computing systems engineered for demanding AI, HPC, and parallel computing workloads.
Brane Workstation Specifications
- CPU Options:
- Intel Xeon processors with advanced AVX-512 support
- AMD Threadripper PRO processors with high core counts
- GPU Support:
- NVIDIA RTX series with Tensor and RT cores
- AMD Instinct and Radeon Pro series
- Specialized Accelerators:
- Kalray MPPA (Massively Parallel Processor Array)
- FPGA integration for custom acceleration
- Memory & Storage:
- High-bandwidth DDR5 memory
- Ultra-fast NVMe SSDs in RAID configurations
Note: For detailed specifications and configuration options, visit the Brane Workstations website.
Unified Development Model #
One of the Brane SDK’s key strengths is its unified development approach, which simplifies programming across heterogeneous hardware while allowing architecture-specific optimizations.
| Architecture | Execution Model | Key Optimization Techniques |
| CPUs (Intel, AMD, Qualcomm) | Multi-threading, SIMD Vectorization | Optimal thread scheduling, cache-aware algorithms, vectorized operations (AVX-512, Neon) |
| NVIDIA GPUs | CUDA Thread Blocks, Warps | Coalesced memory access, shared memory utilization, occupancy optimization |
| AMD GPUs | HIP Workgroups, Wavefronts | Local data share optimization, memory bandwidth management |
| Kalray Manycore Processors | Task-Based Parallelism, Distributed Memory | Pipeline parallelism, deterministic execution patterns |
More detailed optimization techniques and examples are presented in the following sections of this documentation.
Real-World Example: Autonomous Vehicle Computing #
The following example illustrates how different processing architectures work together in a self-driving vehicle, showcasing the Brane SDK’s ability to program heterogeneous systems:
- Fault-Tolerant Execution: The manycore processor can run multiple operating systems simultaneously, ensuring redundancy and increasing safety.
- FPGA: Preprocesses sensor data, executing real-time image processing and LiDAR calculations. Some AI tasks, such as emergency braking, can also be managed due to the FPGA’s ultra-low latency.
- Manycore Processor: Performs computationally intensive tasks like Simultaneous Localization and Mapping (SLAM), object detection, sensor fusion, and AI inference.
- General-Purpose CPU/GPU: Manages overall system coordination, non-critical tasks, and driver feedback.
The Brane SDK enables developers to program all these diverse architectures from a single development environment, streamlining the R&D process with integrated tools and AI-assisted optimization.

Development Flow #
The Brane SDK provides a structured development process for creating applications that leverage heterogeneous computing architectures:

- Hardware Mapping: Determine the optimal hardware architecture for each component of your application. This critical planning step ensures your application achieves maximum performance.
Pro Tip: Use our AI plugin (currently in beta) to automatically suggest optimal hardware mapping based on your algorithm characteristics, or contact our engineering team for personalized guidance. - Algorithm Prototyping (Optional):For complex algorithms, you can develop initial models in Matlab, and use the code generation tools to convert to C/C++ code.
- Project Creation: Set up a structured project using the Gradle build system, which provides dependency management, multi-platform build support, and integration with the Brane tools ecosystem.
- Development & Libraries: Develop your application using the SDK’s supported programming models.
- Build Configuration: Define your build settings in the
build.gradlefile, including source files and directories, external dependencies, target platforms, compiler flags and optimization settings. - Compilation: Use the Brane-Builder tool to compile your application for the target hardware. The builder automatically selects appropriate compilers, applies platform-specific optimizations, generates executable binaries for each target architecture.
- Deployment: Transfer the compiled executables to your target hardware, Brane Workstations, Custom hardware configurations, or Embedded systems.
- Debugging & Optimization: Fine-tune your application’s performance, use GDB for code debugging, leverage platform-specific profiling tools, analyze execution patterns, optimize critical paths.
- AI-Assisted Development: Take advantage of our AI plugins to identify performance bottlenecks, suggest algorithm improvements, recommend optimal hardware mappings, generate optimized code snippets
“Hello World” Tutorial #
This section demonstrates how to create a basic application with the Brane SDK, walking through the process step by step.
Setting Up the Project #
Start by creating a new Gradle project that will serve as the foundation for your application:
$ mkdir apps
$ cd apps
$ gradle init
This initializes a Gradle project with the required configuration files, establishing the build environment for your Brane SDK application.
Configuring the Root build.gradle File #
The root build.gradle file configures the overall project settings and dependencies. Create this file at the project root with the following content:
/**
 * The buildscript block is where you configure the repositories and
 * dependencies for Gradle itself—meaning, you should not include dependencies
 * for your modules here. For example, this block includes the Brane plugins for
 * Gradle as a dependency because it provides the additional instructions Gradle
 * needs to build modules.
 */

buildscript {

    /**
     * The repositories block configures the repositories Gradle uses to
     * search or download the dependencies. Gradle pre-configures support for remote
     * repositories such as JCenter, Maven Central, and Ivy. You can also use local
     * repositories or define your own remote repositories. The code below defines
     * the Brane Repo as the repository Gradle should use to look for its dependencies.
     *
     */

    repositories {
        maven {
            url "s3://com.brane.repository.maven/release/"
            credentials(AwsCredentials) {
                accessKey = System.env.AWS_ACCESS_KEY_ID ?: findProperty('aws_access_key_id')
                secretKey = System.env.AWS_SECRET_ACCESS_KEY ?: findProperty('aws_secret_access_key')
            }
        }
        // Public repositories for additional dependencies
        mavenCentral()
        mavenLocal()
    }

    /**
     * The dependencies block configures the dependencies Gradle needs to use
     * to build your project. The following line adds the Brane plugins for Gradle
     * as a classpath dependency.
     */

    dependencies {
        classpath 'com.brane.plugins:cpu:2.2.1'
    }
}

/**
 * The allprojects block is where you configure the repositories and
 * dependencies used by all modules in your project, such as third-party plugins
 * or libraries. However, you should configure module-specific dependencies in
 * each module-level build.gradle file. ).
 */

// Common configurations that apply to all projects
allprojects {
    repositories {
        mavenCentral()
    }
}
Creating the settings.gradle File #
The settings.gradle file defines your project hierarchy. For this example, we’ll create a single application module:
rootProject.name = 'helloWorld'

include 'helloWorld'
Project Structure #
Create the following directory structure for your “Hello World” application:
helloWorld/
├── build.gradle
└── src
    └── main
        └── c
            └── main.c
This structure offers several advantages:
- Supports hierarchical organization for larger projects
- Follows standard Gradle conventions for source code location
- Enables automatic source discovery by the Brane SDK
- Facilitates easy addition of multiple modules or applications
Module-Level build.gradle Configuration #
Create a build.gradle file in the helloWorld directory to configure your application:
plugins {
    id 'com.brane.cpu.c-application'
}

application {
    targetMachines = [
            machines.linux.x86_64,
    ]
}
This configuration:
- Specifies Linux x86_64 as the target architecture
- Applies the Brane C application plugin
- Sets the application version
Creating the Main Application File #
Create a main.c file in the src/main/c directory with your application code:
#include <stdio.h>

int main() {
    printf("Hello world!\n");
    return 0;
}
Compiling the Application #
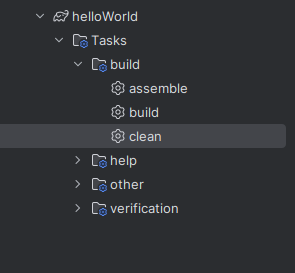
Assemble or Build the application using the Brane-Builder to compile the project. Depending on the target hardware i.e. CPU, GPU, FPGA, Kalray, you will run a specific task. In this project, you can just click on assemble.
Alternatively, if you do not want to use an IDE, you can also type:
$ gradle assembleExpected Output:
BUILD SUCCESSFUL in 2sRunning the Compiled Executable #
Execute your compiled application:
$ ./build/exe/hello/x86_64_linux/hello
Hello world!?
You may download additional examples on the samples page. More complex applications and advanced development workflows will be covered in the next chapters.
Next Steps #
After successfully creating your first Brane SDK application, you can:
- Explore Advanced Features:
- Multi-platform builds targeting different hardware architectures
- Integration with accelerators (GPUs, FPGAs, manycore processors)
- Hardware-specific optimizations
- Extend Your Application:
- Add custom logic to your application
- Incorporate external libraries
- Implement parallel processing using OpenMP or OpenCL
- Learn Best Practices:
- Review our sample applications in the Samples Gallery
- Study architecture-specific optimization techniques in the following chapters
- Participate in our developer community forums
- Access Resources:
- API documentation for supported libraries
- Performance tuning guides
- Architecture-specific programming guides
The following chapters dive deeper into advanced development techniques, hardware-specific optimizations, and real-world case studies using the Brane SDK.


