The Brane SDK provides a streamlined multi-platform compilation framework designed to build applications across various architectures, including Intel, AMD, and Qualcomm CPUs, NVIDIA and AMD GPUs, Kalray Manycore Processors, and FPGAs (Xilinx & Altera/Intel).
The Brane SDK’s compilation system handles numerous complex tasks automatically:
- Intelligent Compiler Selection: The SDK automatically selects the appropriate compiler based on your target architecture
- Environment Configuration Management: Required environment variables and paths are set up without manual intervention
- Cross-Platform Library Integration: Includes headers and libraries specific to each platform
- Hardware-Specific Optimizations: Applies platform-specific optimizations for maximum performance
- Unified Build Process: Coordinates parallel compilation across diverse hardware targets
This approach dramatically simplifies heterogeneous application development by providing a consistent, streamlined workflow regardless of target hardware.
Supported Architectures and Compilation Methods #
The following table outlines the primary architectures supported by the Brane SDK and their corresponding compilation toolchains:
| Architecture | Compiler & Toolchain | Programming Models |
|---|---|---|
| Intel & AMD CPUs | GCC, Clang, Intel OneAPI | C/C++, OpenMP, POSIX Threads (PThreads) |
| Qualcomm CPUs | GCC, Clang (ARM toolchains) | C/C++, OpenMP |
| NVIDIA GPUs | NVIDIA CUDA Toolkit, OpenCL | OpenCL, CUDA |
| AMD GPUs | ROCm (HIP Clang), OpenCL | OpenCL, HIP |
| Kalray Manycore Processors | Kalray AccessCore Toolchain | OpenCL, C/C++ |
| FPGAs (Xilinx & Altera/Intel) | Xilinx Vivado, Intel Quartus Prime | VHDL, Verilog, OpenCL |
The Brane SDK abstracts these diverse toolchains behind a unified Gradle-based build system, allowing developers to focus on their application logic rather than toolchain management.
Compilation for CPUs #
Compiling for x86-64 Intel & AMD CPUs #
For x86_64-based CPUs, the Brane SDK leverages GCC (GNU Compiler Collection) or G++ (GNU C++ Compiler) by default. The SDK’s intelligent build system automatically selects the appropriate toolchain based on the target system architecture and your application requirements.
Example: Fast Fourier Transform (FFT) Application
Let’s examine how to compile an FFT application targeting AMD Threadripper CPUs using the Brane SDK.
Project Structure
fft/
├── build.gradle
└── src
    └── main
        ├── c
        │   ├── fft.c
        │   └── main.c
        └── headers
            └── fft.h
Example build.gradle configuration:
plugins {
    id 'com.brane.cpu.c-application'
}

application {
    targetMachines = [
        machines.linux.x86_64,
        machines.windows.x86_64
    ]

    binaries.configureEach {
        def linkTask = linkTask.get()
        if (toolChain instanceof GccCompatibleToolChain) {
            linkTask.linkerArgs = ['-lm'] // -lm: Links the math library.
        }
    }
}
Configuration Explanation:
- Brane plugin (
com.brane.cpu.c-application): This plugin automatically selects the correct compiler and toolchain for C-based applications, handling the complex setup that would otherwise require manual configuration. - Target Machines: The configuration specifies both Linux and Windows x86_64 targets, allowing cross-platform compilation from a single source code base.
- Math Library Linking: The configuration explicitly links the standard math library (
-lm) required for FFT calculations. The SDK checks for GCC compatibility to ensure the correct linking arguments are used.
Compiling for Qualcomm CPUs (ARM) #
For ARM-based processors like Qualcomm CPUs, the Brane SDK supports cross-compilation using the GCC ARM toolchain (aarch64-linux-gnu). This enables developers to build applications on standard development machines that target ARM-based devices.
Example: Restricted Boltzmann Machine (RBM) Application
This example demonstrates how to configure the Brane SDK to build a C++ application for ARM64 architecture.
Project Structure
/boltzmann/
├── build.gradle
├── LICENSE.md
└── src
    └── boltzmann
        ├── cpp
        │   └── RBM.cpp
        └── headers
            ├── RBM.h
            └── utils.h
Example build.gradle configuration:
plugins {
    id 'com.brane.cpu.cpp-application'
}

version = '1.2.1'

application {
    targetMachines = [
            machines.linux.arm64,
    ]

    source.from file('src/boltzmann/cpp')
    privateHeaders.from file('src/boltzmann/headers')
}
Configuration Explanation:
- Brane plugin (
com.brane.cpu.cpp-application): Automatically selects the appropriate C++ compiler for ARM64 targets. - Target Machines: Specifies ARM64 as the target architecture, triggering the SDK to use cross-compilation.
- Custom Source Paths: The configuration explicitly defines source and header paths for non-standard project structures, ensuring that all files are correctly located regardless of directory organization.
Compilation for GPUs #
Compiling for AMD GPUs (AMD HIP) #
For AMD GPUs, the Brane SDK leverages AMD’s HIP (Heterogeneous-Computing Interface for Portability) framework through HIP Clang. This enables highly optimized parallel computing on AMD’s GPU architectures while providing portability options to other platforms.
Example: Matrix Multiplication Application
Let’s examine how to build a matrix multiplication algorithm targeting AMD Instinct GPUs.
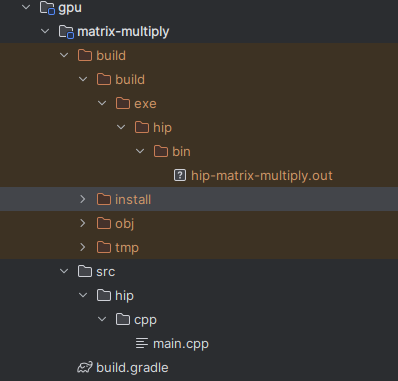
Project Structure
matrix-multiply/
├── build.gradle
└── src
    └── hip
        └── cpp
            └── main.cpp
Example HIP Kernel code:
/**
 * Host function to perform matrix multiplication on a HIP-supported GPU.
 *
 * @param A Host-side input matrix A.
 * @param B Host-side input matrix B.
 * @param C Host-side output matrix C.
 * @param N Size of the matrices (NxN).
 */
void matrixMultiply(const std::vector<float>& A, const std::vector<float>& B, std::vector<float>& C, int N) {
    float *d_A, *d_B, *d_C;

    // Allocate memory on the GPU
    hipMalloc(&d_A, N * N * sizeof(float));
    hipMalloc(&d_B, N * N * sizeof(float));
    hipMalloc(&d_C, N * N * sizeof(float));

    // Copy data to the device
    hipMemcpy(d_A, A.data(), N * N * sizeof(float), hipMemcpyHostToDevice);
    hipMemcpy(d_B, B.data(), N * N * sizeof(float), hipMemcpyHostToDevice);

    // Define block and grid sizes
    dim3 blockSize(BLOCK_SIZE, BLOCK_SIZE);
    dim3 gridSize((N + BLOCK_SIZE - 1) / BLOCK_SIZE, (N + BLOCK_SIZE - 1) / BLOCK_SIZE);

    // Launch the kernel
    hipLaunchKernelGGL(matrixMultiplyKernel, gridSize, blockSize, 0, 0, d_A, d_B, d_C, N);

    // Copy result back to the host
    hipMemcpy(C.data(), d_C, N * N * sizeof(float), hipMemcpyDeviceToHost);

    // Free GPU memory
    hipFree(d_A);
    hipFree(d_B);
    hipFree(d_C);
}
Example build.gradle configuration:
plugins {
    id 'com.brane.accelerator.gpu.hip.cpp-application' // Plugin for HIP-based C++ applications
}

application {
    // Define the target machines for this application
    targetMachines = [machines.linux.x86_64, machines.windows.x86_64]
}
Configuration Explanation:
- Target Machines: While the code runs on AMD GPUs, the host machines are specified as Linux and Windows x86_64 platforms, as the GPU code is launched from these host environments.
- HIP-specific Plugin: The
com.brane.accelerator.gpu.hip.cpp-applicationplugin configures the build system to use AMD’s HIP compiler toolchain.
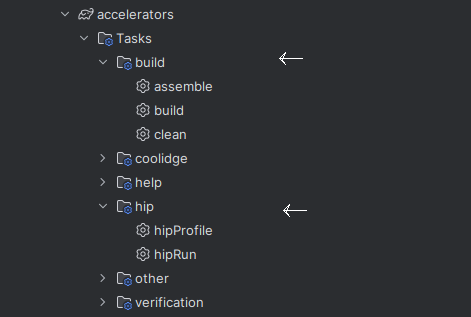
AMD HIP specific features #
The Brane SDK’s HIP plugin offers several advanced capabilities:
- ROCm Profiler: A command-line tool for profiling HIP applications.
- Multi-GPU Support: Allows targeting multiple AMD GPUs simultaneously.
AMD HIP build option #
One of the AMD HIP plugin is that it supports cross-compilation for both AMD and NVIDIA GPUs. By default, HIP is configured to target AMD Instinct GPUs, but it can also generate CUDA-compatible binaries for NVIDIA GPUs. This makes HIP a great choice for portable GPU-accelerated applications.
To explicitly enable NVIDIA GPU support, you can modify the HIP build flags.
> Configure project :DevToolkit:tutorial:accelerators:gpu:matrix-multiply
[INFO] GPU architecture undefined: x86-64. Using default HIP arguments.
After compilation, the binary will be located in the build directory.
Compiling for NVIDIA GPUs (CUDA & OpenCL) #
For NVIDIA GPUs, the Brane SDK offers comprehensive support for both CUDA (using NVIDIA’s nvcc compiler) and OpenCL for vendor-agnostic GPU programming. CUDA provides direct access to NVIDIA’s hardware features, while OpenCL enables cross-platform compatibility.
Example: SAXPY (Single-Precision A·X Plus Y) Application
The following example demonstrates a CUDA implementation of the SAXPY operation targeting NVIDIA GPUs.
Project Structure
saxpy/
├── build.gradle
└── src
    └── cuda
        └── cpp
            └── main.cpp
Example CUDA Kernel code:
#include <stdio.h>

__global__
void saxpy(int n, float a, float *x, float *y)
{
  int i = blockIdx.x*blockDim.x + threadIdx.x;
  if (i < n) y[i] = a*x[i] + y[i];
}

int main(void)
{
  int N = 1<<20;
  float *x, *y, *d_x, *d_y;
  x = (float*)malloc(N*sizeof(float));
  y = (float*)malloc(N*sizeof(float));

  cudaMalloc(&d_x, N*sizeof(float));
  cudaMalloc(&d_y, N*sizeof(float));

  for (int i = 0; i < N; i++) {
    x[i] = 1.0f;
    y[i] = 2.0f;
  }

  cudaMemcpy(d_x, x, N*sizeof(float), cudaMemcpyHostToDevice);
  cudaMemcpy(d_y, y, N*sizeof(float), cudaMemcpyHostToDevice);

  // Perform SAXPY on 1M elements
  saxpy<<<(N+255)/256, 256>>>(N, 2.0f, d_x, d_y);

  cudaMemcpy(y, d_y, N*sizeof(float), cudaMemcpyDeviceToHost);

  float maxError = 0.0f;
  for (int i = 0; i < N; i++)
    maxError = max(maxError, abs(y[i]-4.0f));
  printf("Max error: %f\n", maxError);

  cudaFree(d_x);
  cudaFree(d_y);
  free(x);
  free(y);
}
The build.gradle configuration is the following:
plugins {
    id 'com.brane.accelerator.gpu.cuda.cpp-application' // Plugin for HIP-based C++ applications
}

application {
    // Define the target machines for this application
    targetMachines = [machines.linux.x86_64, machines.windows.x86_64]
}
Configuration Explanation:
- CUDA-specific Plugin: The
com.brane.accelerator.gpu.cuda.cpp-applicationplugin automatically configures the build process to use NVIDIA’s CUDA toolchain. - Host Platforms: Similar to the HIP configuration, this specifies the host machines that will run the application and communicate with the GPU.
The Brane SDK handles all the complexities of CUDA compilation, including finding the CUDA installation, setting up the correct compilation flags, and managing the CUDA-specific build process.
Compiling for Kalray Manycore Processors #
Kalray’s manycore architecture represents a specialized computing platform optimized for deterministic, high-performance parallel processing. The Brane SDK supports this architecture through Kalray’s GCC-based toolchain (kvx-gcc, kvx-g++) and provides optimized support for OpenCL and POSIX Threads (pthreads).
Example: Vector Addition with OpenCL
This example demonstrates how to implement and compile a vector addition kernel for execution on a Kalray MPPA processor.
Project Structure
/vectorAddition/
├── build.gradle
├── README.md
└── src
    └── main
        ├── cpp
        │   └── main.cpp
        ├── headers
        └── opencl
            └── vector_add.cl
Example OpenCL Kernel code:
// Define a kernel function for asynchronous vector addition.
__kernel void vector_add(__global int *a, __global int *b, __global int *c) {
	int i = get_global_id(0); // Get the global ID to identify the work-item.
	int j = get_local_id(0); // Get the local ID within the work-group.
	int nb_pe = get_local_size(0); // Get the number of processing elements (work-items) in the local work-group.

    // Define local memory to store a segment of the input vectors and the result vector.
	__local int la[16];
	__local int lb[16];
	__local int lc[16];

    // Asynchronously copy a segment of the 'a' vector from global to local memory.
    // 'eva' will hold the event associated with this operation.
	event_t eva = async_work_group_copy(la, &a[i], nb_pe, 0);

    // Asynchronously copy a segment of the 'b' vector from global to local memory.
    // 'evb' will hold the event associated with this operation.
	event_t evb = async_work_group_copy(lb, &b[i], nb_pe, 0);

    // Wait for the asynchronous copy of the 'a' (and then 'b') vector to complete.
	wait_group_events(1, &eva);
	wait_group_events(1, &evb);

    // Perform the addition operation locally on the PE (processing element).
	lc[j] = la[j] + lb[j];

    // Synchronize all work-items in the work-group to ensure addition is completed.
	barrier(CLK_LOCAL_MEM_FENCE);

    // Asynchronously copy the result vector 'lc' from local to global memory.
    // 'evc' will hold the event associated with this operation.
	event_t evc = async_work_group_copy(&c[i], lc, nb_pe, 0);

    // Wait for the asynchronous copy of the 'c' vector to complete.
	wait_group_events(1, &evc);
}
This kernel showcases Kalray-specific optimizations, particularly the use of asynchronous memory operations and local memory to improve performance on the MPPA architecture.
Example main c++ code:
/*
 * Copyright (C) 2025 Brane Technologies LLC - All Rights Reserved
 * Licensed under the Apache License, Version 2.0 (the "License");
 */

#include <iostream>
#include <vector>
#include <fstream>
#include <sstream>
#include "opencl.hpp" // Include OpenCL-Wrapper

const int ARRAY_SIZE = 1024;

// Function to read OpenCL kernel file
std::string read_file(const std::string& filename) {
    std::ifstream file(filename);
    if (!file.is_open()) {
        throw std::runtime_error("Failed to open kernel file: " + filename);
    }
    std::ostringstream content;
    content << file.rdbuf();
    return content.str();
}

int main() {
    try {
        // List available OpenCL devices
        std::vector<Device_Info> devices = get_devices();
        for (const auto& device : devices) {
            print_device_info(device);
        }

        // Select the best device (highest FLOPS)
        Device_Info selected_device = select_device_with_most_flops(devices);
        std::cout << "\nSelected Device:\n";
        print_device_info(selected_device);

        // Load and compile OpenCL kernel
        std::string kernel_code = read_file("vector_add.cl");
        Device device(selected_device, kernel_code); // Create OpenCL device

        // Allocate memory on both Host & Device
        std::vector<int> a(ARRAY_SIZE), b(ARRAY_SIZE), result(ARRAY_SIZE, 0);
        for (int i = 0; i < ARRAY_SIZE; i++) {
            a[i] = i;
            b[i] = i * 2;
        }

        Memory<int> bufferA(device, ARRAY_SIZE, 1, a.data());
        Memory<int> bufferB(device, ARRAY_SIZE, 1, b.data());
        Memory<int> bufferC(device, ARRAY_SIZE, 1);  // Output buffer

        // Determine optimal workgroup size
        size_t max_workgroup_size;
        selected_device.cl_device.getInfo(CL_DEVICE_MAX_WORK_GROUP_SIZE, &max_workgroup_size);
        size_t workgroup_size = std::min(max_workgroup_size, (size_t)64);

        // Create and run the kernel
        Kernel vector_add_kernel(device, ARRAY_SIZE, workgroup_size, "vector_add", bufferA, bufferB, bufferC);

        bufferA.write_to_device();
        bufferB.write_to_device();

        #define NB_ITER (10)
        for (int i = 0; i < NB_ITER; ++i) {
            vector_add_kernel.run();

            bufferC.read_from_device();
            int* dst = bufferC();  // Access results

            // Verify results
            bool success = true;
            for (int j = 0; j < ARRAY_SIZE; ++j) {
                int expected = a[j] + b[j];
                if (dst[j] != expected) {
                    std::cerr << "Mismatch at index " << j << ": " << expected << " != " << dst[j] << std::endl;
                    success = false;
                }
            }

            if (!success) {
                std::cerr << "Verification failed in iteration " << i << "!" << std::endl;
                return EXIT_FAILURE;
            }

            std::cout << "Iteration " << i << " passed." << std::endl;

            // Increment input buffers for next iteration
            for (int j = 0; j < ARRAY_SIZE; ++j) {
                a[j]++;
                b[j]++;
            }
            bufferA.write_to_device();
            bufferB.write_to_device();
        }

        std::cout << "Success: All iterations completed correctly!" << std::endl;
    } catch (const std::exception &e) {
        std::cerr << "Error: " << e.what() << std::endl;
        return EXIT_FAILURE;
    }

    return EXIT_SUCCESS;
}
The host code demonstrates how to discover OpenCL devices, select the most powerful one, set up memory buffers, and coordinate kernel execution with appropriate error checking.
Example build.gradle configuration:
plugins {
    id 'com.brane.coolidge.cpp'
}

application {
    targetMachines = [machines.linux.x86_64,
    coolidgeMachines.clusterOS.architecture("MPPA_v2")
    ]
}
Configuration Explanation:
- Dual-Target Setup: This configuration enables cross-compilation for both standard x86_64 CPUs and Kalray MPPA accelerators, allowing the application to be executed on the Kalray Coolidge.
- Kalray-specific Plugin: The
com.brane.coolidge.cppplugin loads the Kalray Coolidge toolchain and manages the complex compilation process for MPPA processors.
Kalray specific features #
The Brane SDK’s Kalray plugin provides several specialized features for MPPA development.
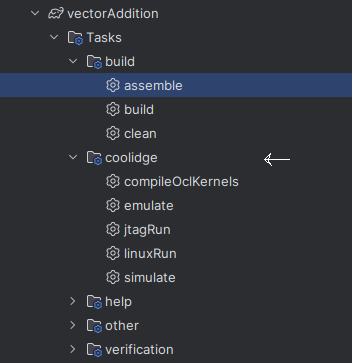
For example, it automates:
- compileOclKernels: Automatically compiles OpenCL kernels for the Kalray Coolidge.
- emulate: Runs an emulation of the OpenCL code execution on an x86_64 host and/or Kalray Coolidge CPU. Useful for rapid testing without hardware execution.
- simulate: Simulates OpenCL execution on x86_64 or Kalray Coolidge. The simulator provides higher accuracy than emulation but is significantly slower.
- jtagRun / linuxRun: Executes the OpenCL kernel on the Kalray Coolidge processor via JTAG (for low-level debugging) or directly on a Linux-based host/server.
Compiling for FPGAs (Xilinx & Altera/Intel) #
FPGAs (Field-Programmable Gate Arrays) offer unparalleled flexibility through reconfigurable hardware. The Brane SDK supports FPGA development by integrating with industry-standard tools like Xilinx Vivado and Intel Quartus Prime, allowing developers to generate optimized hardware bitstreams from HDL (Hardware Description Languages) like VHDL and Verilog.
Example: Bitcoin Mining Core #
This example demonstrates an FPGA-based Bitcoin mining implementation using Verilog.
Project Structure
/BitcoinMiner/
├── build.gradle
├── README.md
├── scripts
│   └── mine
│       ├── config.example.tcl
│       ├── json_rpc.tcl
│       ├── jtag_comm.tcl
│       ├── mine.bat
│       ├── mine.tcl
│       └── utils.tcl
└── src
    ├── IP
    │   ├── vio_0
    │   │   ├── doc
    │   │   │   └── vio_v3_0_changelog.txt
    │   │   ├── hdl
    │   │   │   ├── ltlib_v1_0_vl_rfs.v
    │   │   │   ├── verilog
    │   │   │   │   ├── ltlib_v1_0_2_lib_fn.vh
    │   │   │   │   ├── ltlib_v1_0_2_ver.vh
    │   │   │   │   ├── xsdbs_v1_0_4_i2x.vh
    │   │   │   │   └── xsdbs_v1_0_4_in.vh
    │   │   │   ├── vio_v3_0_26_vio_include.v
    │   │   │   ├── vio_v3_0_syn_rfs.v
    │   │   │   └── xsdbs_v1_0_vl_rfs.v
    │   │   ├── sim
    │   │   │   └── vio_0.v
    │   │   ├── synth
    │   │   │   └── vio_0.v
    │   │   ├── vio_0.bmj
    │   │   ├── vio_0_bmstub.v
    │   │   ├── vio_0.dcp
    │   │   ├── vio_0_ooc.xdc
    │   │   ├── vio_0_sim_netlist.v
    │   │   ├── vio_0_sim_netlist.vhdl
    │   │   ├── vio_0_stub.v
    │   │   ├── vio_0_stub.vhdl
    │   │   ├── vio_0.veo
    │   │   ├── vio_0.vho
    │   │   ├── vio_0.xdc
    │   │   └── vio_0.xml
    │   └── vio_0.xci
    ├── main
    │   └── verilog
    │       ├── fpgaminer_top.v
    │       ├── main_pll.v
    │       ├── PLLs
    │       │   ├── altera_pll.v
    │       │   └── xilinx_pll.v
    │       ├── Probes
    │       │   ├── altera_virtual_wire.v
    │       │   └── xilinx_virtual_wire.v
    │       ├── sha-256-functions.v
    │       ├── sha256_transform.v
    │       ├── uart_comm.v
    │       ├── uart_rx.v
    │       ├── uart_tx_fifo.v
    │       ├── uart_tx.v
    │       └── virtual_wire.v
    └── test
        ├── resources
        │   ├── reverse_hex.tcl
        │   ├── test_data.txt
        │   └── test_hasher.py
        └── verilog
            └── test_fpgaminer_top.v
Example build.gradle configuration:
plugins {
    id 'com.brane.hdl'
    id 'com.brane.hdl.vivado'
}

HardwarePlugin {
    top = "fpgaminer_top"
    sim = "Test_Blinking"
    revision = "rev1"
}

sourceSets {
    main {
        verilog {
            srcDirs += [] //
        }
    }
    test {
        verilog {
            srcDirs += [] //
        }
    }
}
Configuration Explanation:
- HDL Plugin: The
com.brane.hdlplugin provides general support for HDL-based designs. - Vivado Integration: The
com.brane.hdl.vivadoplugin integrates the Xilinx Vivado toolchain for FPGA synthesis, implementation, and bitstream generation. - Hardware Configuration:
top: Defines the top-level module of the FPGA design (fpgaminer_top)sim: Specifies the testbench module for simulationrevision: Helps manage different hardware revisions
- Source Sets: Define the locations of Verilog source files for both implementation and testing.
Features #
The Brane SDK’s HDL plugins transform FPGA development by automating the complex, time-consuming tasks typically required when working with hardware description languages. This automation creates a streamlined development experience that allows hardware engineers to focus on their designs rather than struggling with toolchain configuration and management.
The SDK handles these essential FPGA development tasks automatically:
- Project Generation: Creates complete Vivado or Quartus projects from your source files.
- Synthesis and implementation: Runs HDL compilation and synthesis operations for Xilinx or Intel/Altera platforms.
- Simulation: Supports HDL simulation for functional verification before hardware deployment
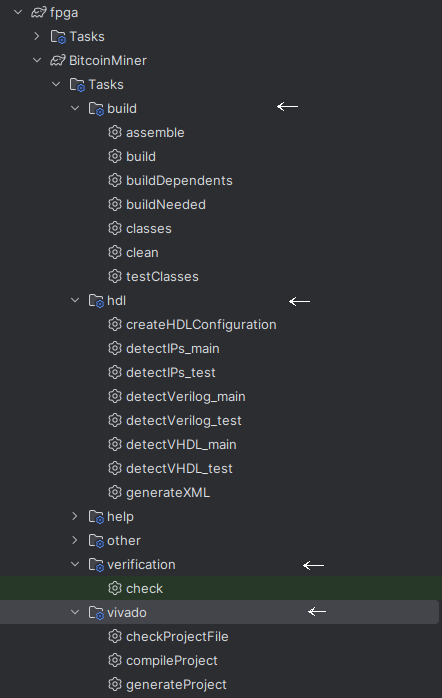
The Brane SDK exposes several specialized Gradle tasks for FPGA development workflows:
- generateXML: Generates a generic project specification in XML format, which can be used as an intermediate representation or for documentation
- createHDLConfiguration: Creates a configuration file tailored for either Xilinx Vivado or Intel Quartus, setting up appropriate parameters for your specific FPGA target
- detectX_main: Automatically detects and catalogs main HDL source files in your project structure
- detectX_test: Automatically identifies test bench files and verification components
- checkProjectFile: Verifies that Xilinx Vivado or Intel Quartus software is installed correctly and accessible.
- generateProject: Creates a complete project in either Vivado or Quartus format.
- compileProject: Launches a full compilation and synthesis process using the target vendor’s tools
- verify: Executes simulation-based verification of your FPGA design
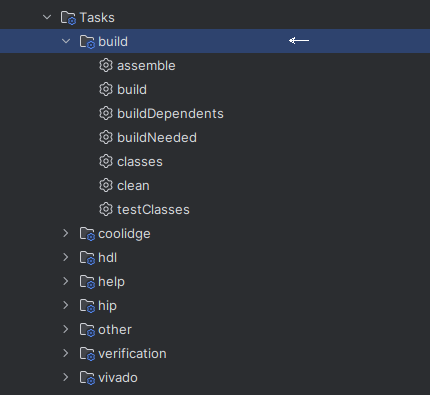
For most FPGA development scenarios, you can simply run the standard (biuld) assemble command. This will trigger a complete workflow that:
- Detects your FPGA configuration and target platform
- Generates an appropriate project for either Quartus or Vivado
- Automatically includes all relevant source files and IP cores
- Configures constraints and timing requirements
- Runs a full compilation, synthesis, and implementation process
- Generates programming files for your target FPGA
For functional verification through simulation, you can use the gradle check task, which will:
- Set up the appropriate simulation environment
- Compile test benches
- Run simulation using vendor-specific tools
- Report verification results
These automation features dramatically reduce the complexity of the FPGA development process, eliminating error-prone manual steps and allowing hardware developers to focus on their design innovation rather than toolchain management. The standardized workflow also makes it easier to integrate FPGA development into larger, heterogeneous systems that may include CPUs, GPUs, and other accelerators.
Compiling a Multi-Target Project #
One of the most powerful features of the Brane SDK is its ability to compile for multiple target architectures within a single build process. This capability is essential for heterogeneous computing applications that leverage different hardware platforms for specific tasks.
Compiling a Multi-Target Project
A single Brane SDK project can target multiple architectures simultaneously through a unified build configuration. The example below demonstrates a comprehensive multi-target setup:
Project Structure
multi-target/
├── accelerators
│   ├── coolidge
│   │   ├── basics
│   │   │   ├── openCL
│   │   │   │   └── vectorAddition
│   │   │   │       ├── build.gradle
│   │   │   │       ├── README.md
│   │   │   │       └── src
│   │   │   │           └── main
│   │   │   │               ├── cpp
│   │   │   │               │   └── main.cpp
│   │   │   │               ├── headers
│   │   │   │               └── opencl
│   │   │   │                   └── vector_add.cl
│   │   │   └── MPPABenchmarkPapi
│   │   │       ├── build.gradle
│   │   │       ├── README.md
│   │   │       └── src
│   │   │           ├── main
│   │   │           │   ├── c
│   │   │           │   └── headers
│   │   │           ├── Makefile
│   │   │           └── mppa
│   │   │               └── c
│   │   │                   └── main.c
│   ├── fpga
│   │   └── blinkingLeds
│   │       ├── build.gradle
│   │       └── src
│   │           ├── main
│   │           │   └── verilog
│   │           │       └── Blinking.v
│   │           └── test
│   │               └── verilog
│   │                   ├── Test_Blinking.v
│   │                   └── vector_test.txt
│   └── gpu
│       └── matrix-multiply
│           ├── build.gradle
│           └── src
│               └── hip
│                   └── cpp
│                       └── main.cpp
└── x86_64_CPU
    ├── fft
        ├── build.gradle
        ├── LICENSE.md
        └── src
            └── main
                ├── c
                │   ├── fft.c
                │   └── main.c
                └── headers
                    └── fft.h
Example Root build.gradle configuration:
This configuration defines multiple subprojects targeting different architectures:
rootProject.name = 'multi-target'

include 'multi-target:x86_64_CPU:fft'
include 'multi-target:accelerators:gpu:matrix-multiply'
include 'multi-target:accelerators:coolidge:basics:openCL:vectorAddition'
include 'multi-target:accelerators:coolidge:benchmark:MPPABenchmarkPapi'
include 'multi-target:accelerators:fpga:blinkingLeds'
Configuration Breakdown:
- x86_64_CPU:fft: Fast Fourier Transform application compiled with GCC for Intel or AMD CPUs
- gpu:matrix-multiply: Matrix multiplication using HIP for AMD GPUs
- coolidge:openCL:vectorAddition: Vector addition using OpenCL targeting Kalray Coolidge processors
- coolidge:benchmark:MPPABenchmarkPapi: Performance benchmarking application for Kalray MPPA
- fpga:blinkingLeds: Verilog project for FPGA implementation using Xilinx toolchain
The Brane SDK automates the compilation process by detecting the appropriate toolchains (GCC, NVCC, HIP Clang, kvx-gcc, Vivado/Quartus) for each target architecture.
Features #
The Brane SDK’s HDL plugins automate numerous tasks in the FPGA development workflow.
The Brane SDK’s build system intelligently manages the compilation process for multi-target projects:
- Toolchain Detection: Automatically identifies the appropriate compilers and tools for each target
- Parallel Execution: Compiles different targets concurrently to maximize efficiency
- Resource Management: Optimizes system resource usage during compilation
- Dependency Resolution: Handles inter-module dependencies across different architectures
When running (build) assemble, the system compiles all specified targets in parallel, typically completing CPU, GPU, and accelerator builds first, while FPGA synthesis (which generally takes longer) continues in the background.
This parallel approach dramatically improves development efficiency for heterogeneous computing applications, allowing developers to test some components while others complete their build process.
Advanced Build Options and Customization
The Brane SDK provides extensive customization options for specialized build requirements. The build system can be tailored to specific project needs through:
- Custom Compiler Flags: Fine-tune optimization levels and target-specific options
- Conditional Compilation: Apply different build settings based on target architecture
- Library Integration: Specify and manage external dependencies
- Build Hooks: Insert custom build steps at various points in the process
For detailed information on advanced build configurations, refer to the SDK’s Gradle plugin documentation.
Next Steps #
Now that you understand how to compile for different architectures using the Brane SDK, you can:
- Explore advanced configurations in the following chapters to optimize performance across platforms
- Customize application logic by modifying source files with your specific algorithms
- Integrate additional modules, libraries, and dependencies to build complete heterogeneous computing solutions
- Apply platform-specific optimizations using the architectural insights from later documentation sections
- Leverage debugging and profiling tools specific to each target platform
The upcoming documentation sections will provide in-depth information on performance tuning, debugging techniques, and real-world case studies that demonstrate the full power of the Brane SDK for heterogeneous computing applications.


